
NPM
npm基础
包的安装/更新/卸载
装包,默认安装最新版本,直接npm i 会安装package.json中dependencies的所有包
1 | npm i 或者 npm install |
安装指定版本
1 | npm i xx@1.0 |
装包到生产环境(也就是上线后需要的依赖),在package.json的dependencies中生成版本信息
1 | npm i -S 或者 npm i --save |
装包到开发环境(也就是开发时需要的依赖),在package.json的devDependencies中生成版本信息
1 | npm i -D 或者 npm i --save-dev |
精确安装指定版本的包到生产环境。精确的意思就是,什么版本就是什么版本,版本号前面的^ 会消失掉。有^ 代表是补丁版本
1 | npm i xx@1.0 --save-exact |
卸载包
1 | npm uninstall xx |
更新包,默认更新到最新
1 | npm update xx@1.0 |
检查包是否过时,默认列出所有过时的包
1 | npm outdated |
安装同一个包的不同版本,如要引入1版本,则import ‘xx1’。npm 6.9及以后的版本可用
1 | npm i xx1@npm:xx@1 |
信息查看
查看安装过的包,加-g就是查看全局安装过的包, –depth 0就是查看第一层,不再深入递归查询出子文件夹
1 | npm ls |
查看包的安装路径
1 | npm root xx |
查看某个包在线上的所有版本
1 | npm view xx versions |
配置向
设置代理
1 | npm config set proxy="http://xx.com:8080" |
设置安装源,如上就是设置源为国内的淘宝镜像
1 | npm config set registry="https://registry.npm.taobao.org" |
查看所有配置
1 | npm config list -l |
1 | npm info xxx #查看更详细 |
npm发布自己的包
package.json配置的包名唯一,每次更新版本号升级
1 | # 仅第一次使用需要添加用户,之后会提示你输入你的npm账号密码以及注册邮箱 |
自动更新package版本号(大版本号需要手动更新)
1 | npm version patch |
发布
1 | npm publish |
删除发布的包的指定版本
1 | npm unpublish 包名@1.0 |
查看npmjs服务器上包的版本信息
1 | npm info xxx |
其它
清除npm本地缓存
1 | npm cache clean |
初始化package.json
1 | npm init |
NPM使用
添加本地 npm 用户设置
1 | 仅第一次使用需要添加用户,之后会提示你输入你的npm账号密码以及注册邮箱 |
创建模块
package.json 文件是必不可少的。我们可以使用 NPM 生成 package.json 文件
npm init
1 | npm init |
把包发布到 npm 上
1 | npm publish |
自动更新package版本号(大版本号需要手动更新)
1 | npm version patch # 将报发布至npm务必更新 |
Github+NPM
如果每次都要在本地进行npm publish的话,npm 的提交是整个包一起上传的,不存在增量更新,耗时不说,而且还往往需要架梯子才能正常上传。所以我们可以把它交给 github action 来完成。
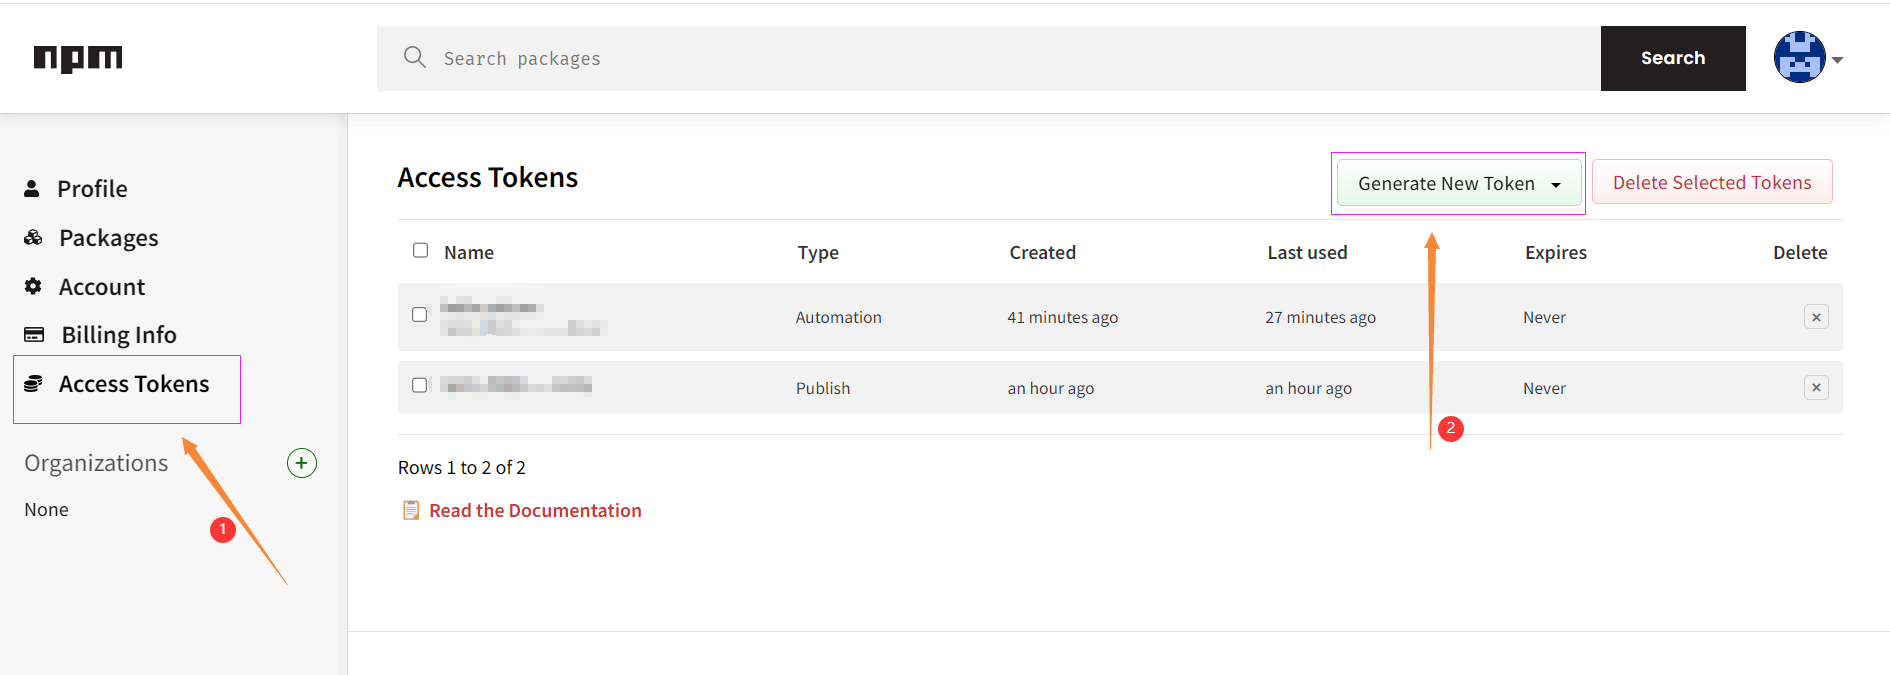
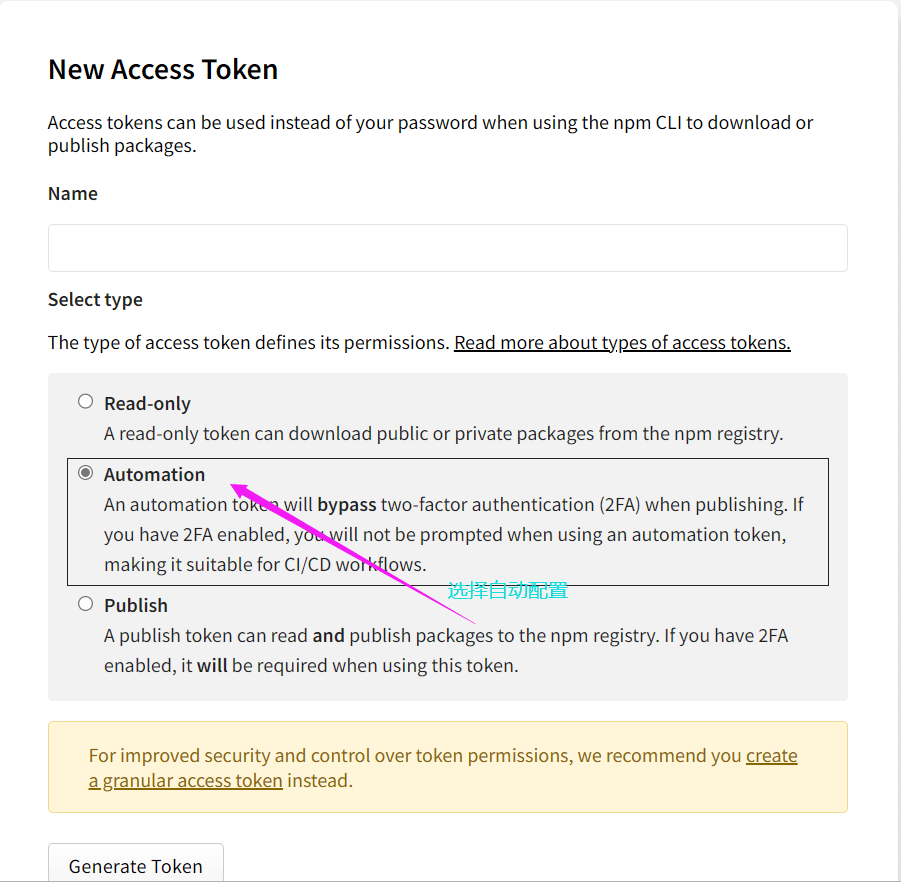
在npm 官网->头像->Access Tokens->Generate New Token,勾选 Automation 选项,Token只会显示这一次,之后如果忘记了就只能重新生成重新配置了。
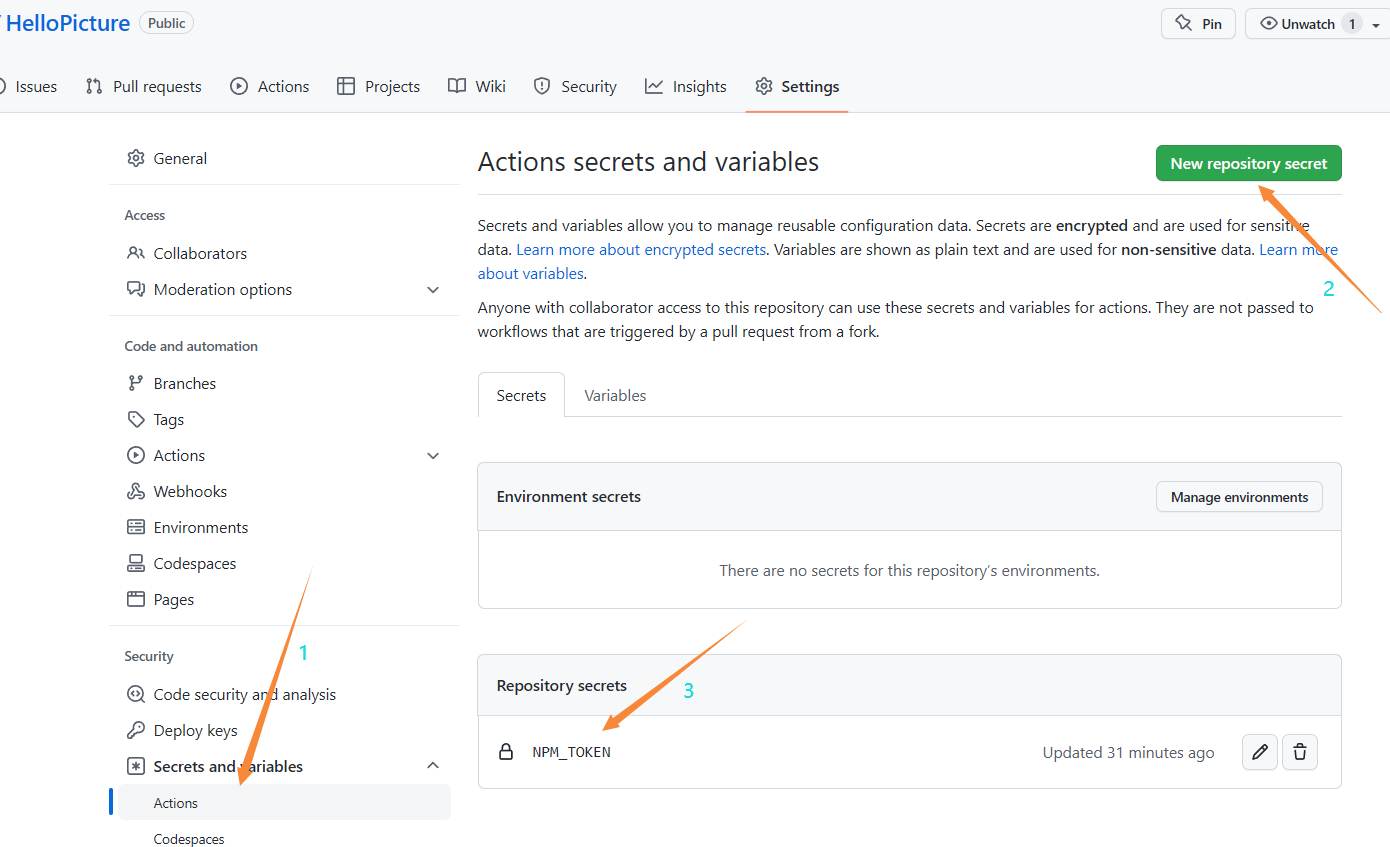
在 github 的[AssetsRepo]仓库设置项里添加一个名为NPM_TOKEN的secrets,把获取的 Npm 的 Access token 输入进去。
在本地的[AssetsRepo]文件夹下新建[AssetsRepo]/.github/workflows/autopublish.yml
1 | name: Node.js Package |
上传新增内容至 github,即可触发部署
1 | 将更改提交 |
form:安知鱼
本博客所有文章除特别声明外,均采用 CC BY-NC-SA 4.0 许可协议。转载请注明来自 沐语`Blog!
相关推荐


评论